Late blight remains the foliar disease tomato growers fear most. In West and Central Africa, the alternation of rainy and dry seasons, rainy-season cropping and production under shade nets or tunnels regularly create ideal weather windows for Phytophthora infestans. Two hours of water on the leaves is enough to start an infection, and the first symptoms appear only 4 to 7 days later: by the time a lesion is visible, the contamination is already ahead of you. This guide, written for market gardeners and commercial growers, sets out how to make the right diagnosis, choose the right treatment and, above all, avoid reaching that point.
The biology of Phytophthora infestans
Late blight is not a fungus in the strict sense. Phytophthora infestans is an oomycete, a pseudo-fungus related to brown algae, belonging to the order Peronosporales. The distinction is not academic: it explains why most conventional fungicides do not work against it, and why strategies based on copper and certain specific active ingredients remain the standard.
Two biological traits shape the whole control strategy:
- In the early stage of infection the pathogen is a strict biotroph: it can only live on living plant tissue (tomato, potato, black nightshade, eggplant). There are no spores sitting in the soil and infecting the plot year after year, except where oospores from sexual reproduction are present, and these are still rare in sub-Saharan Africa.
- Its sporangia are spread by wind and rain splash over several kilometres. A treated plot can be reinfected from a neighbouring field as soon as the dew lifts.
In other words, control is collective and preventive, not curative and individual.
The weather conditions that trigger an epidemic
Three microclimate parameters need to be monitored at the same time:
- Mean temperature between 15 and 26 °C. The optimum is around 22 to 24 °C. Above 30 °C for extended periods, the disease slows down sharply.
- Relative humidity above 90 %, typically cool nights followed by heavy dew, or the periods after storms.
- Free water on the leaf. This is the limiting factor: without a film of water, sporangia cannot germinate, and two hours are enough to start an infection. Producing new sporangia, by contrast, needs a prolonged wetness period of at least 7 hours.
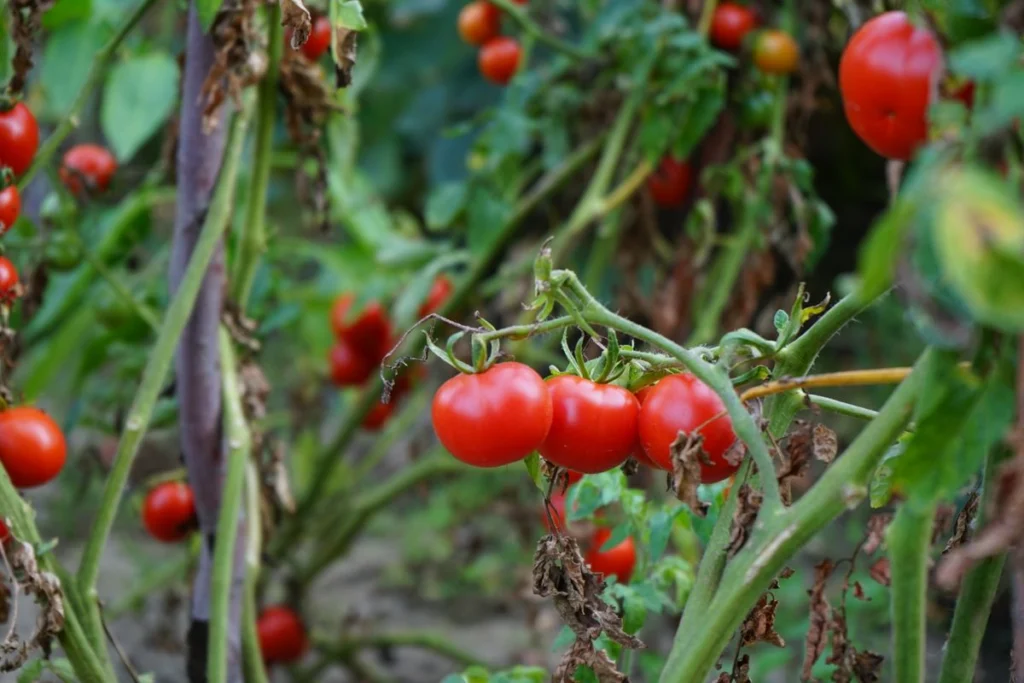
In Central and West Africa, all three conditions come together almost daily during the short and long rainy seasons, as well as in poorly ventilated tunnels around midday. The working rule: as soon as heavy rain falls during flowering or fruit set, the risk is real over the following 4 to 7 days.
The thresholds to keep in mind
The technical sheet of the plant protection warning network of the Quebec Ministry of Agriculture, Fisheries and Food gives finer thresholds, useful when deciding on a preventive pass.
| Parameter | Published threshold |
|---|---|
| Optimal development | Between 15 and 25 °C, humidity close to 100 % |
| Relative humidity required | Above 90 % |
| Infection temperatures | Nights at 10 to 15 °C, days at 15 to 21 °C |
| Water on the leaves sufficient to infect | Two hours |
| Sporangia form | Between 10 and 24 °C, with a wetness period of at least 7 hours |
| Mode of germination | Direct germination on the plant above 18 °C, release of zoospores below 18 °C |
| Incubation before visible symptoms | 4 to 7 days |
| Development halts | Above 30 °C, without the pathogen being killed |
INRAE places the optimum between 16 and 22 °C, with a clear slowdown beyond sustained 25 °C, and notes that the pathogen needs free water or saturating humidity in order to infect. The integrated pest management programme of the University of California treats average temperatures of 50 to 78 °F, roughly 10 to 26 °C, as favourable. The University of Florida adds the benchmark of a relative humidity above 80 %, above which lesions turn purple to black and carry the white sporangial growth.
Two practical consequences. First, the two hour threshold of free water means a dew at first light is enough, with no rain at all. Second, the incubation of 4 to 7 days explains why a plot that looks clean next to a focus may already be infected, and why the area around a focus has to be treated, not only the focus itself.
Symptoms: the differential diagnosis that matters
Too many growers treat late blight while thinking it is early blight (Alternaria solani) or bacterial wilt. The three diseases often occur together in tropical climates, and their treatments are not interchangeable. The table below follows the descriptions published by the University of California statewide integrated pest management program and by publication PP301 of the University of Florida.
| Plant part | Late blight | Early blight |
|---|---|---|
| Leaf | Irregular, small, pale to dark green water soaked spots, surrounded by a zone of yellowish tissue. They expand fast and turn brown then purplish black | Black or brown spots 6 to 12 mm across, leathery, marked with a concentric ring pattern, on older leaves first |
| Leaf underside | White sporangial growth above 80 % relative humidity, the lesion turning purple to black. In warm dry weather it turns brown, dries out and looks papery | No white growth |
| Stem and petiole | Brown to black lesions, greasy in appearance, which can also carry sporulation | Elongated spots on the stem |
| Fruit | Discoloration usually starts on the upper side of the fruit, and affected fruit stay firm until secondary bacterial infection sets in | Sunken, dry spots, often concentric, frequently near the calyx end |
Seeing the greyish-white downy growth on the underside of the leaf, early in the morning, remains the most reliable criterion: that is what confirms late blight. The University of Florida notes that the disease affects every plant part except the roots. Faced with a round, leathery lesion ringed with concentric circles on a lower leaf, you are looking at early blight. Blossom-end rot, for its part, causes a dry necrosis at the end opposite the stalk and is a physiological disorder linked to calcium, not an infectious disease.
Prevention: nine practices that do most of the work
The fight against late blight is won before the first symptoms appear. The preventive measures below, properly combined, sharply cut disease pressure in our agroecological systems.
- Choose a tolerant cultivar. Modern F1 hybrids carry resistance genes from World Vegetable Center breeding work. Ask your input supplier to help you identify varieties suited to your area.
- Space plants widely enough. In open fields, aim for 60 to 80 cm between plants and 100 to 120 cm between rows. In greenhouses, never go above 2.5 plants/m². A dense canopy means trapped humidity, and trapped humidity means late blight. Orient the rows along the prevailing winds as well, so dew dries quickly.
- Stake and de-leaf. Systematically remove the lower leaves up to the first fruit truss, then remove senescent leaves every week. Take the debris well away from the plot immediately, and never put it in the compost.
- Water at the base, never over the foliage, and preferably in the morning. Drip irrigation is an investment that pays for itself in a single season of avoided late blight pressure. The University of California is explicit on this point: overhead sprinklers favour late blight. The laying traps that make a small network fail are listed in our article on drip irrigation mistakes in market gardening.
- Mulch the soil. Mulch stops the splash that carries sporangia from the soil up to the lower leaves. The choice of material and the useful thickness are set out in our article on mulching a vegetable bed.
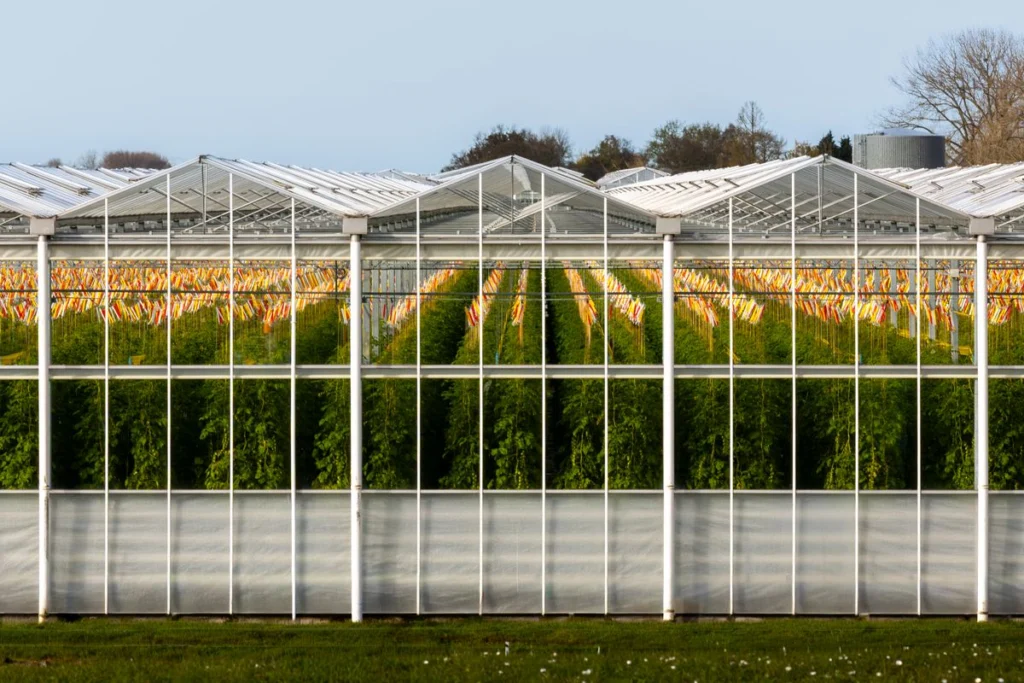
- Ventilate greenhouses and tunnels aggressively. Open them at sunrise and use forced ventilation if needed. In a tropical agricultural greenhouse, well-sized side and ridge ventilation is the first line of defence. The design rules in figures are gathered in our file on agricultural greenhouses in tropical Africa.
- Start from healthy transplants. A nursery that is ventilated, raised off the ground and watered at the base produces seedlings that do not arrive in the field already carrying the disease. Running a nursery under light cover is described in our guide to a nursery under shade net, whose rules on height, ventilation and watering apply to every vegetable species.
- Rotate with non-solanaceous crops for at least 3 years. Avoid following tomato with potato and then eggplant on the same plot, and do not plant tomato next to a potato field. Remove secondary hosts too: black nightshade (Solanum nigrum) and volunteer potato plants are active reservoirs.
- Keep a weather monitoring log. Record rainfall, temperature and evening humidity. Any combination of rain and a night with relative humidity above 90 % triggers an alert for a preventive spray within 48 hours.
How much varietal choice weighs: a trial in western Cameroon
Dietchou and co-authors published in 2024, in the International Journal of Biosciences, a trial run in the western highlands of Cameroon on several tomato varieties with and without fungicide protection. Three treatments were compared: a double action formulation combining chlorothalonil and cymoxanil, and two contact products based on mancozeb and on maneb.
The severity gaps are considerable: 6.6 % and 7.3 % on varieties AVTO1219 and AVTO1311 protected with the double action formulation, against 95.1 % on variety RIO GRANDE 2 left untreated. Total yield follows the same curve, from 3.92 tonnes per hectare on the untreated RIO GRANDE + variety to 59.27 tonnes per hectare on variety CLN1462A protected with the double action formulation.
Two lessons. Varietal choice weighs as much as the spray programme, and the question to put to your seed supplier concerns how the variety behaves against late blight in your own precise zone. And an unprotected control in a damp highland zone can lose almost all of its marketable harvest. Always check that the products you use are registered for tomato in your country.
Calibrate the sprayer before spraying
A preventive spray only protects the surfaces it effectively covers, and an uncalibrated knapsack sprayer applies either too little or too much. The guide on knapsack sprayer use published by the Silsoe Research Institute with the University of Zimbabwe gives the method.
- Mark out a 100 metre run and measure the swath width, which usually matches the row spacing.
- Walk at about 1 metre per second, holding an even pumping stroke from one end of the run to the other.
- Measure the volume of water used over the run, then apply the formula: 10,000 m² multiplied by the volume sprayed in litres, divided by the swath width in metres multiplied by the length of the run in metres.
- The worked example in the guide: 1.5 litres sprayed over 100 metres with a swath width of 0.9 metre gives (10,000 x 1.5) divided by (0.9 x 100), that is 167 litres per hectare.
- Recalculate after adding the product, spraying into a container, because the additive changes the output.
The same guide takes 200 litres per hectare as a reference volume. On a staked tomato the volume has to rise as the canopy develops, since protection comes from covering both leaf surfaces. Three safety rules deserve to be pinned up in the store: never blow out a blocked nozzle or a clogged hose with your mouth, rinse the sprayer with about one litre of water and repeat the operation twice more, and never store the unit with product inside it, not even overnight, or the parts will corrode.
Treatment: framework, rates and intervals
In Africa, the field standard remains Bordeaux mixture (copper sulphate and lime). It is strictly preventive: it stops sporangia that land on the leaf from germinating, but it does not destroy mycelium that is already established.
Bordeaux mixture: the protocol
- Spray rate: follow the copper content and the rate printed on the label of the product registered in your country. Start at the low rate; keep the high rate for very high pressure after repeated rain.
- Timing: first application as soon as plants reach 15 to 20 cm and the first flower truss is forming, then repeat according to the risk level set out below.
- Pre-harvest interval: observe the interval printed on the label of the product used. This interval is essential for consumer food safety.
- Maximum number of applications per cycle: keep to the maximum stated on the label. Copper builds up in the soil and disrupts microbial life over the long term.
Spray rhythm by risk level
The Quebec warning network sheet proposes a useful gradation, transferable to any broad spectrum contact product.
| Situation | Interval between two passes |
|---|---|
| No late blight reported in the region, weather favourable to the disease | 7 to 10 days |
| No late blight reported, warm dry weather | 10 to 14 days |
| Late blight present in the region, plot still clean | Tightened intervals, alternating contact and penetrant products |
| Focus confirmed on the plot | 5 to 6 days, with products targeting late blight |
| After 25 mm of cumulative rainfall | Renew the contact product, which is washed off |
Alternating modes of action
Alternating contact and penetrant products limits the selection of less sensitive strains. Systemic fungicides are for farms with access to crop protection advice only: strictly follow the labels approved by your country’s agriculture authority, the rates and the pre-harvest intervals. Never apply them on your own initiative without advice.
Operator safety
Copper is classified as an irritant. Always wear nitrile gloves, safety goggles, a dust mask and clothing that covers arms and legs. Rinse equipment thoroughly after use. Never spray in full sun, because of the risk of copper leaf burn.
What to do when an outbreak has already started
Once the first symptoms are visible, prevention alone is no longer enough. The priority becomes stopping the spread, not saving the affected leaves:
- Pull out symptomatic plants, bag them and take them out of the field. Never compost them, never leave them on the ground, and not at the end of the bed.
- Destroy an area at least twice as large as the visible focus, including plants with no symptoms yet, since incubation lasts 4 to 7 days.
- Disinfect pruning shears between plants.
- Apply a fungicide targeting late blight, on professional advice.
- Stop all overhead sprinkler irrigation. Switch to drip if you have not already done so.
- Reduce density by removing suckers and lower leaves, and increase ventilation.
Field practice counts as much as the product. Do not scout while dew is present, because walking through wet foliage carries spores. Always start the round on clean plots before affected ones, change overshoes between plots and wash your hands. After harvest, the University of California recommends that vines be completely dead for two to three weeks before they are pulled, and that all plant debris be destroyed.
If a large part of the foliage is affected and the plot is not isolated, it may pay better to harvest whatever can be harvested early and turn the plot over, rather than stacking up costly treatments with uncertain results.
A scouting calendar over one tomato cycle
| Stage | Protective action | Trigger |
|---|---|---|
| Nursery | Healthy transplants, watering at the base, ventilating the shade structure | Routine |
| Establishment after transplanting | Staking, mulching, sprayer calibration | Routine |
| Canopy build up | Scouting the lower leaves, first preventive pass | Nights at 10 to 15 °C or long dews |
| Flowering and fruit set | Intervals of 7 to 10 days, tightened in favourable weather | Heavy rain, or late blight reported in the region |
| Fruit filling | Interval of 5 to 6 days, pulling and bagging of foci | Focus confirmed on the plot |
| After harvest | Destruction of nightshade debris, removal of volunteers | Routine |
Build a system, do not chase a treatment
The winning strategy against late blight in tropical climates is agronomic and climate-based before it is chemical. A grower who has chosen the right cultivar, placed the crop well in the seasonal calendar, correctly sized irrigation and protected cropping, and checks the weather every day clearly reduces the number of passes needed per season.
This is exactly the kind of integrated design our teams offer growers and project developers through our agricultural consulting and engineering services and our range of crop protection inputs and solutions. For a quote matched to your plot, go through the Contact page.
Sources and references
- Réseau d’avertissements phytosanitaires, Ministry of Agriculture, Fisheries and Food of Quebec, sheet on field tomato late blight
- INRAE, Ephytia, VigiMildiou, tomato late blight
- University of California Statewide Integrated Pest Management Program, Late Blight on Tomato
- University of California Statewide Integrated Pest Management Program, Early Blight on Tomato
- University of Florida IFAS Extension, publication PP301, Late Blight of Tomato
- Dietchou P. V., Tiaze Fopah N. L., Keuete Kamdoum E., Tsopmbeng Noumbo G., 2024, International Journal of Biosciences 25(5), 64 to 76
- Silsoe Research Institute and University of Zimbabwe, Knapsack sprayer use, second edition
Article written by the JOGOO Agriculture agronomy team. Crop protection recommendations must be adapted to the products approved in your country.
Frequently asked questions
How do I recognise tomato late blight?
Late blight produces irregular, water soaked leaf spots surrounded by a zone of yellowish tissue, which expand fast and turn brown then purplish black. On the underside of the leaf, greyish-white sporangial growth appears above 80 % relative humidity, and that sign is what confirms the diagnosis. On fruit, discoloration usually starts on the upper side and the fruit stays firm.
How long does leaf wetness have to last for late blight to infect?
Two hours of water on the leaves is enough to start an infection, according to the Quebec plant protection warning network sheet. Producing new sporangia, by contrast, needs a wetness period of at least 7 hours between 10 and 24 °C, and the first symptoms appear after 4 to 7 days of incubation.
How do you tell late blight from early blight?
An early blight lesion measures 6 to 12 mm, stays leathery, shows concentric rings and appears first on older leaves, with no white growth on the underside. A late blight lesion is irregular, water soaked, edged with a yellowish zone, and carries that white growth in humid conditions.
At what temperature does tomato late blight stop?
Development stops above 30 °C, but the pathogen is not killed and resumes as soon as the temperature falls back below 25 °C with high humidity.
After how much rain should a contact treatment be renewed?
After 25 mm of cumulative rain, according to the Quebec plant protection warning network sheet, because the product is washed off the leaf surface.
Does drip irrigation protect against late blight?
It does not protect on its own, but it removes two major factors: the duration of leaf wetness and splashes of contaminated soil. The University of California notes that overhead sprinklers favour the disease.
Further reading
- Tomato growing: crop management guide: canopy ventilation, staking and drip irrigation, three levers that reduce late blight pressure before any spraying.
- Setting up a nursery under shade net: clearance under the net, ventilation and watering at the base, the rules that produce healthy seedlings from the start.
- Why mulch a cabbage bed, and with what material: useful thickness, choice of material and how to lay mulch, the measure that cuts the splashes carrying spores.
- Chilli pepper growing technical guide: another solanaceous crop, with the same soil-borne pests and the same need for a 3-year rotation.
Further reading
- Hydroponic tomatoes: substrate, nutrient solution and greenhouse management: under cover, driving the irrigation through drippers removes overhead watering and leaf wetness by itself, the first factor in infection.
- Market gardening in Africa: where crop health management sits among the other technical items of a vegetable scheme.
- Sprinkler spacing on a vegetable bed: if your network stays on sprinklers, the settings that shorten the leaf wetness period.